3D Printing at Home, RepRap!
The best thing about reprap is printing a printer with a printer. That’s right, a printer that can print a copy of itself, for the most part. You still need all the electronics and metal parts. I printed all the parts for my printer on a printer at work, and now I’m able to print someone else a printer if they wanted.
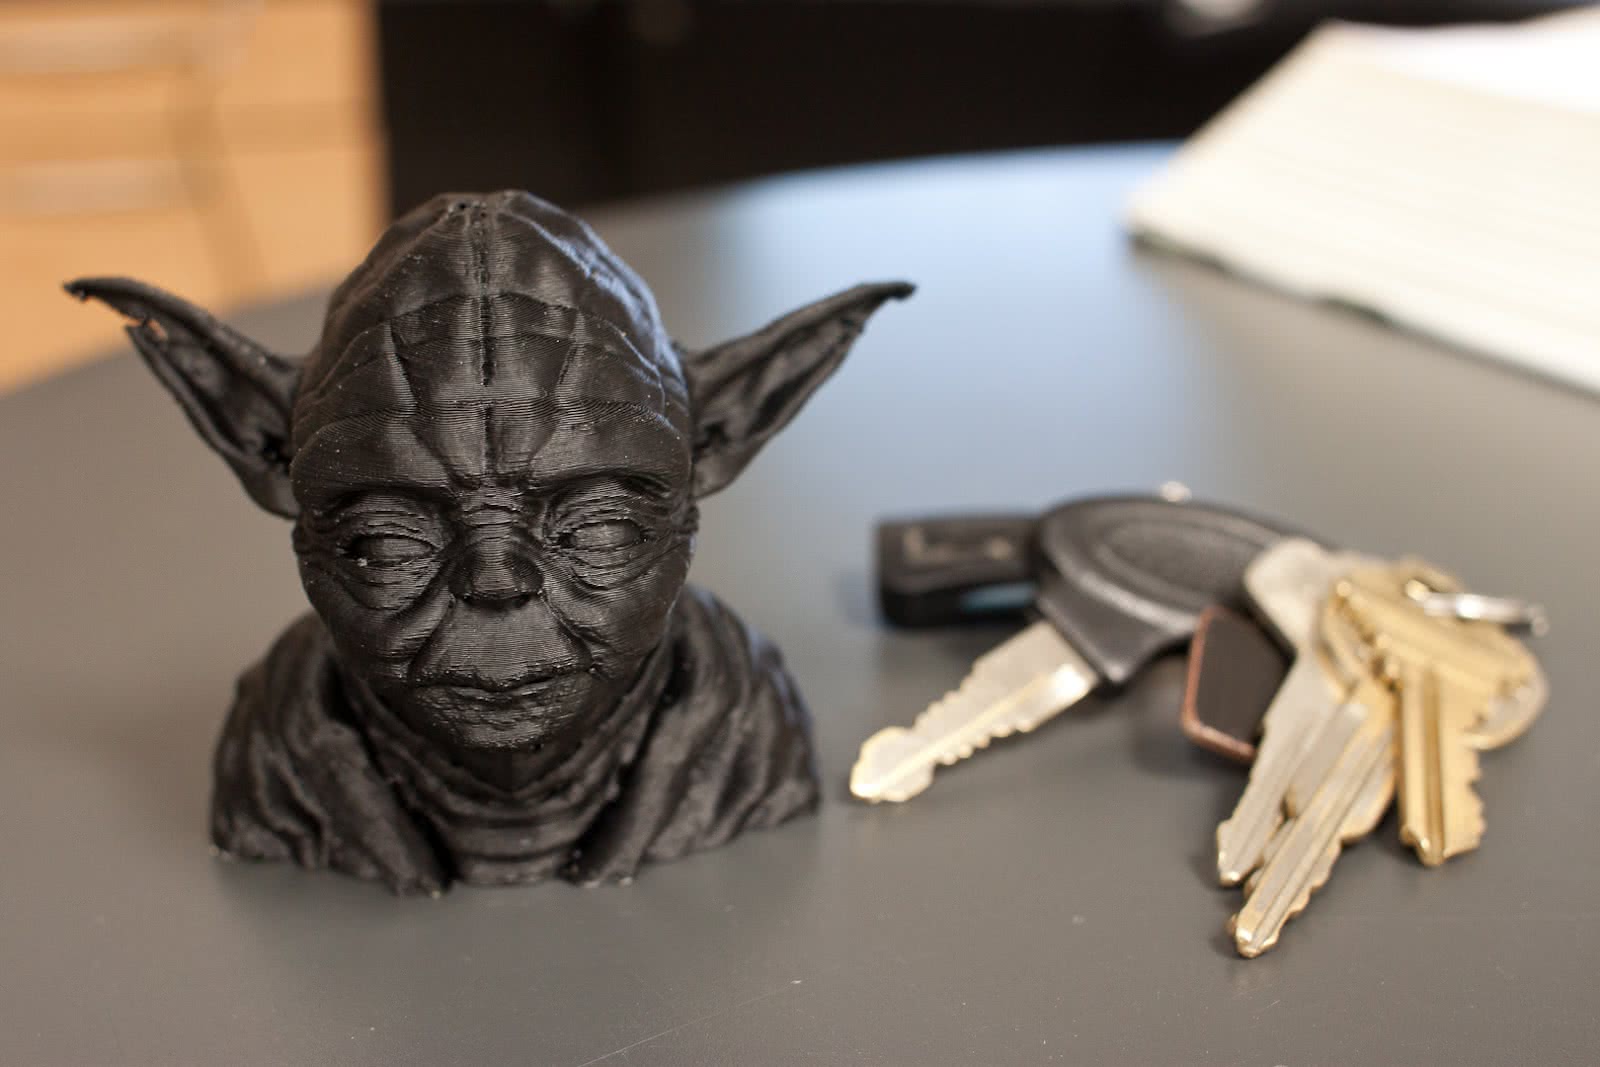
I started this project back in January with the idea that I wouldn’t always have a printer at work sitting 10 feet from me. It took a few months to finish, but I finally have a 3D printer at home. I’m pretty amazed with the results. Its almost as good as a dimension printer for some prints and much cheaper to print on than a commercial printer, almost 10 times cheaper! Here’s the famous Yoda head, printed with 0.1mm resolution. The model of the printer is a Mendel Prusa, named after a few guys who designed it. The printer has a few parts, (minerals in reprap talk) from various places. The raw materials, like rods and bots I bought from www.mcmaster.com. I couldn’t build all the more complicated parts myself so I found some people who sell them. The print head is the budaschnozzle with a 0.5mm nozzle that I picked up from lulzbot.com for about $95. I also got a heated place from them. The control board is a RAMP 1.4 Arduino Shield and the firmware running is Marlin. The red board on my printer is a quad stepper motor controller board from sparkfun.com. I just happen to have it around so that’s why I used it instead of the normal smaller boards that plug onto the RAMPS board.
There are a few sites I found really helpful while building the printer. Basically, most of the reprap stuff has a wiki. So when I just lost or need help, the first the I would do is google something like lulzbot wiki, or prusa wiki. The wiki usually can answer every question as long as you’re willing to read. Another useful place is forums.reprap.org. There’s a bunch of good guys who will answer simple questions, and a lot of common questions have already been answered. And the place I found really helpful is a group on Flickr called “The Art of 3D Print Failure” found here www.flickr.com/groups/3d-print-failures/. There are a lot of good examples of prints gone wrong and what fixed it.
<div class="separator" style="clear: both; text-align: center;"></div><div class="separator" style="clear: both; text-align: center;"></div><div class="separator" style="clear: both; text-align: center;"></div>
Here’s a few images through the build process. Getting the frame together was pretty easy.
<div class="separator" style="clear: both; text-align: center;">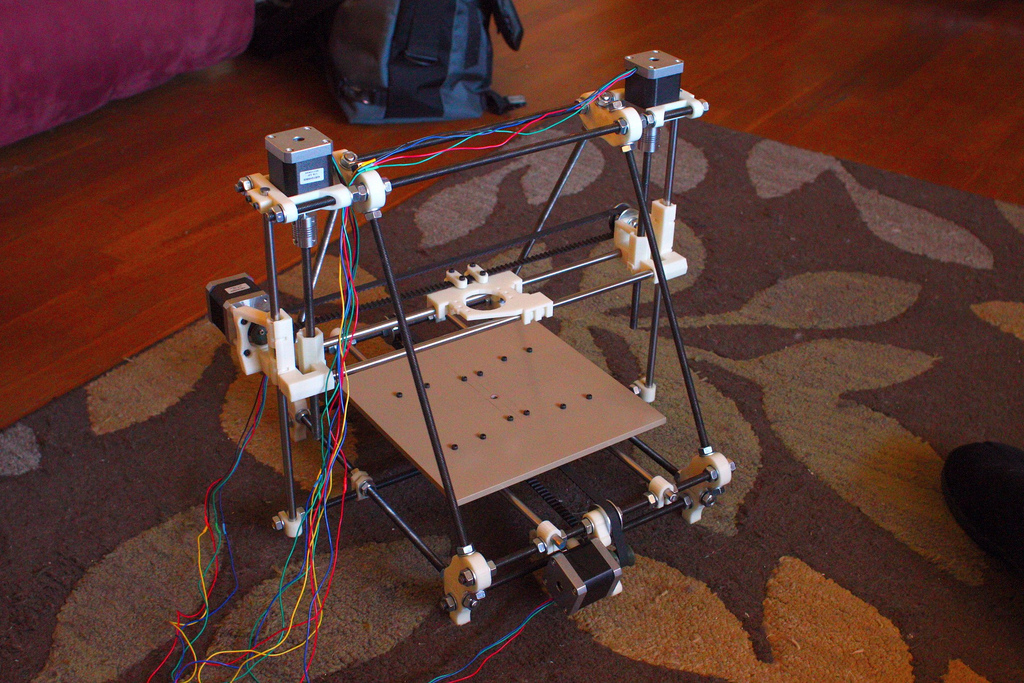 </div>
Getting it all wired up and working was a bit harder. Here’s the printer mostly working.
<div class="separator" style="clear: both; text-align: center;"> </div>
<div class="separator" style="clear: both; text-align: center;"></div>I decided to build an enclosure for the printer to do two things. Maintain a more steady temperature, and keep the cats from playing with the printer. We have a swamp cooler and the air flow can warp prints or make them fail entirely. Keep the air more consistent really paid off. All those wires certainly attracts cats, and the cat hair was getting all over everything. My friend Tom helped build the enclosure with his CNC router table.
<div class="separator" style="clear: both; text-align: center;"> </div><div class="separator" style="clear: both; text-align: center;">
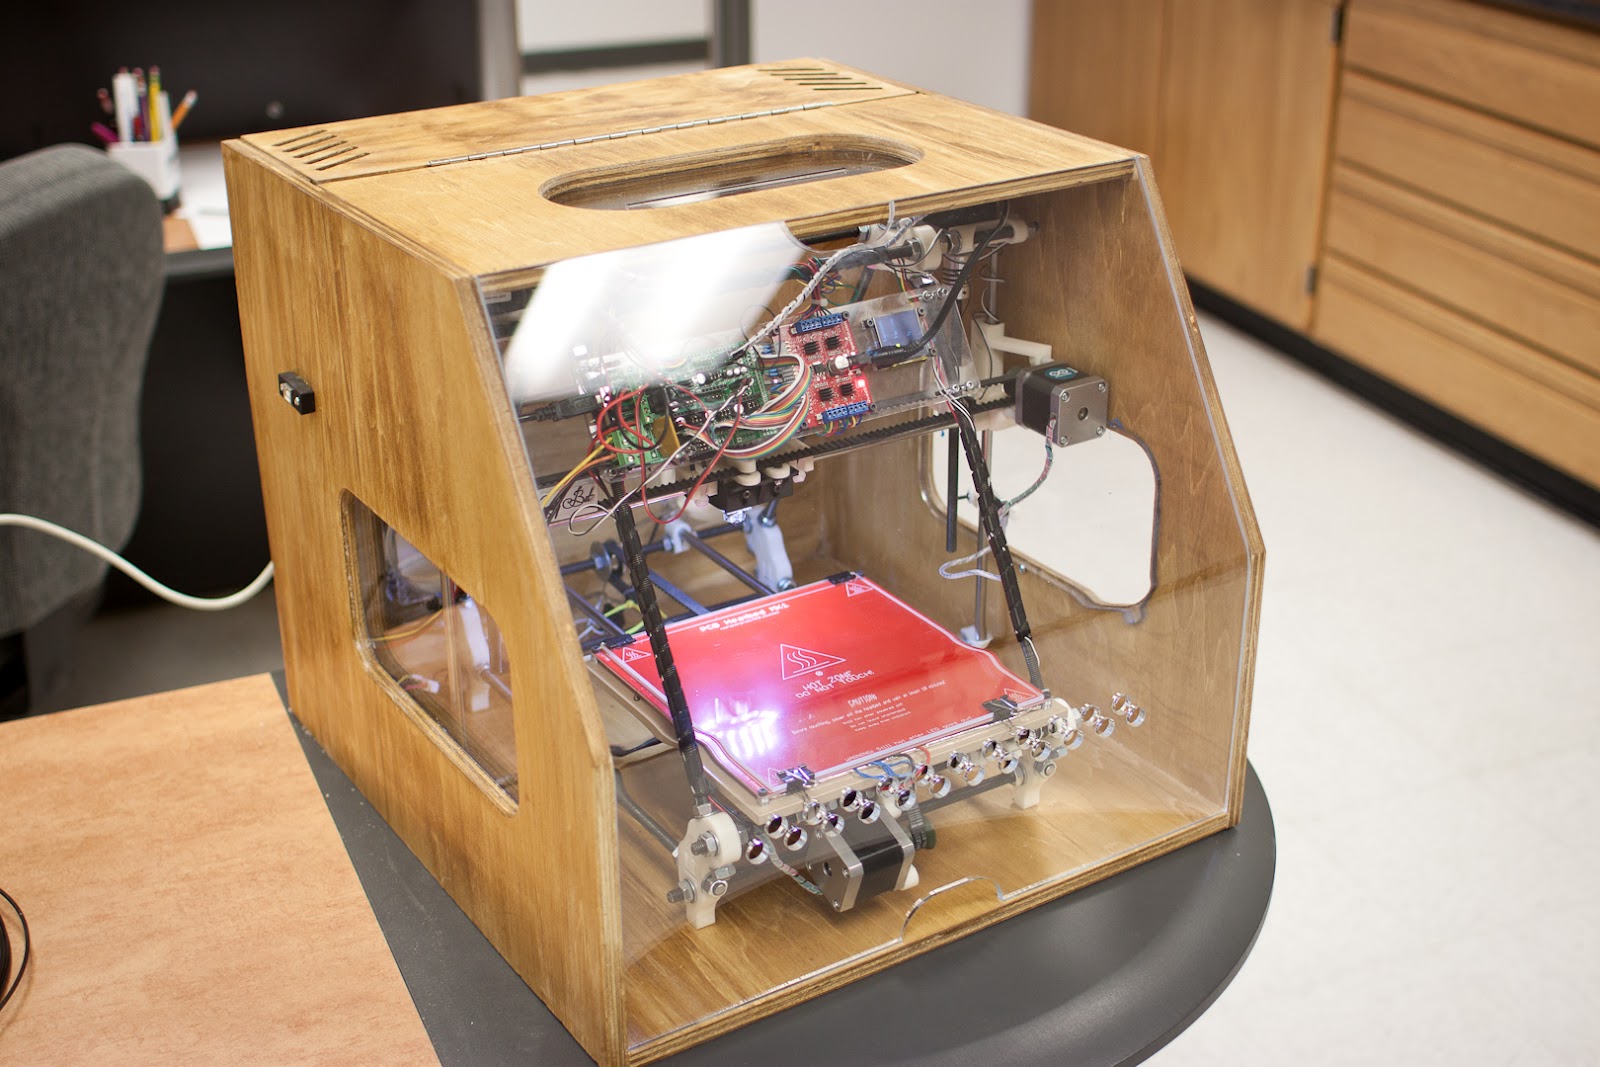 </div>
Here’s a few videos of the CNC table building the box, and a video of the printer actually printing.
<div class="separator" style="clear: both; text-align: center;"></div>
<div class="separator" style="clear: both; text-align: center;"></div><div style="text-align: center;">
</div>